HELP and SUPPORT
For help installing NetDrive, please visit our Storage Guide, Troubleshooting and Use cases.
Details of Licenses and Accounts issues are explained in Documents.
For help installing NetDrive, please visit our Storage Guide, Troubleshooting and Use cases.
Details of Licenses and Accounts issues are explained in Documents.
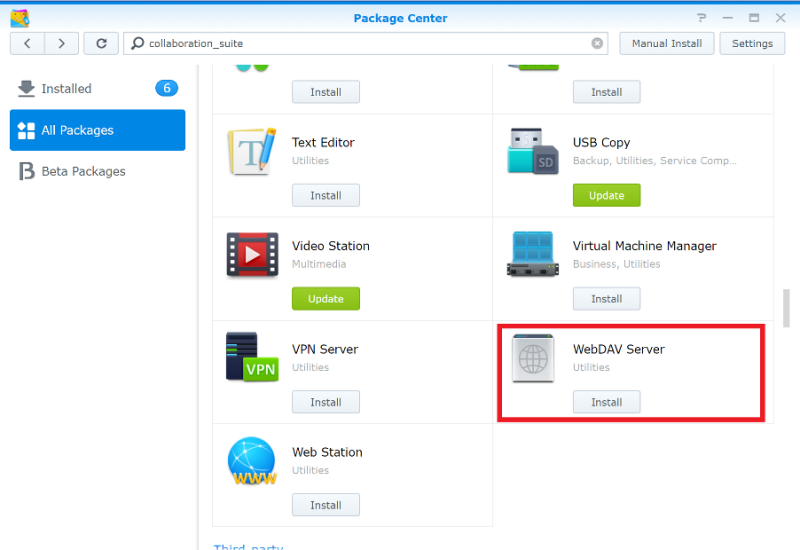
It is required to install WebDAV in Synology NAS. Go to Package Center and install WebDAV.
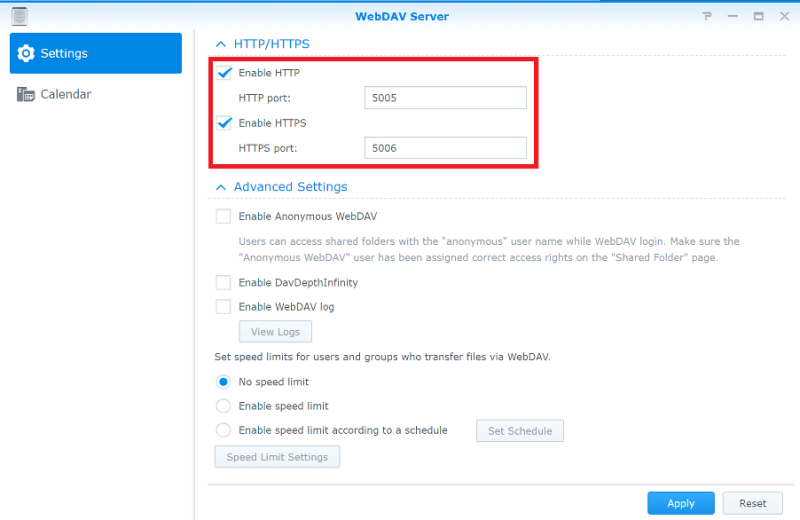
Run WebDAV Server and check both Enable HTTP and Enable HTTPS. Basically, Synology WebDAV uses port number 5005 for HTTP and 5006 for HTTPS.
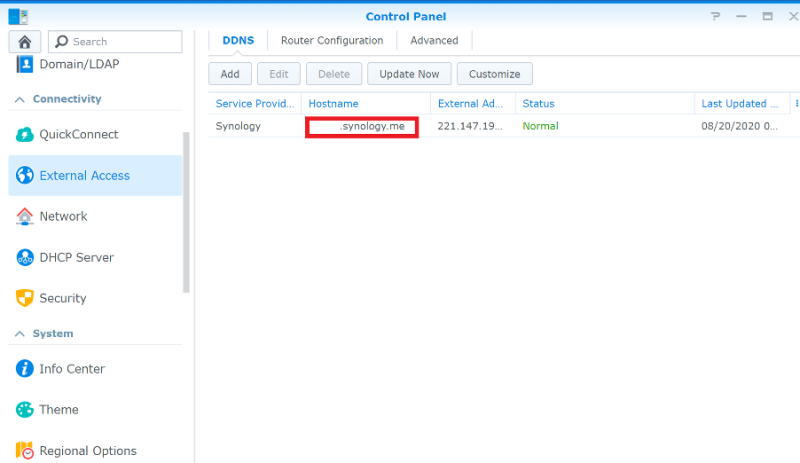
When connecting to Synology NAS through the internet, it is required to complete DDNS setup. DDNS setup enables to access to Synology NAS through the internet. (Omit DDNS setup of Synology NAS if already completed)
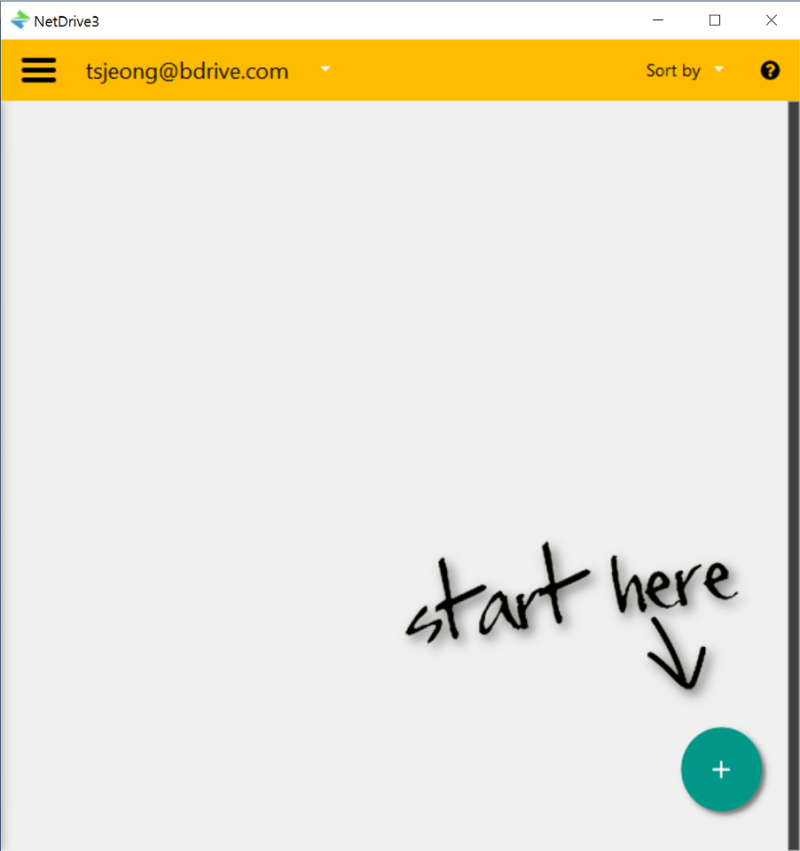
Click “+” button near “Start here” and then add a new Drive Item.
Select your WebDAV item from STORAGE TYPE list and then click “CONNECT”.
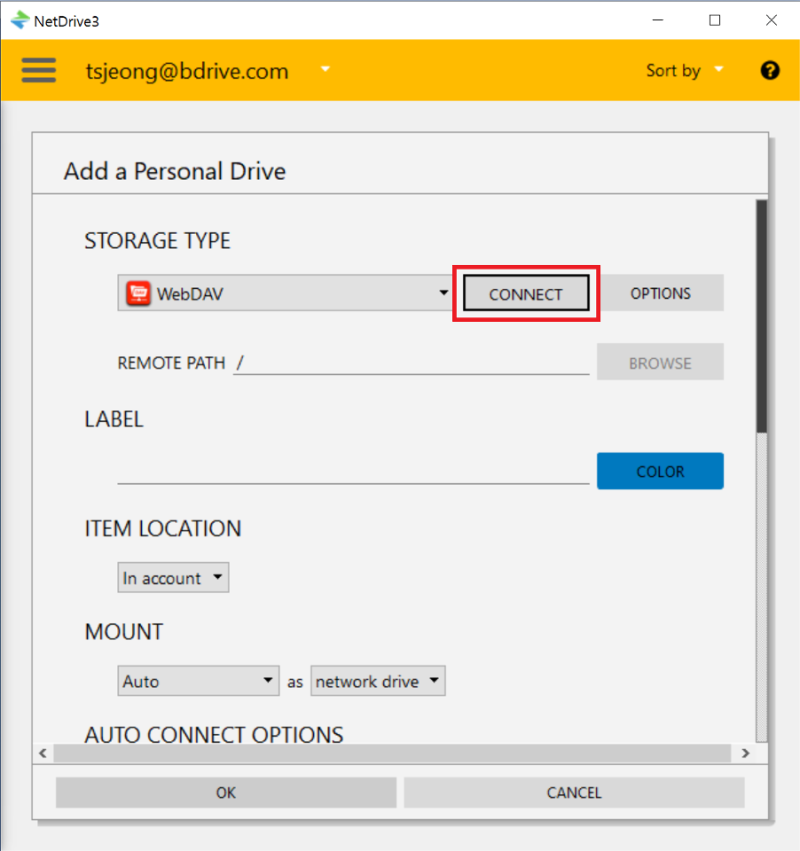
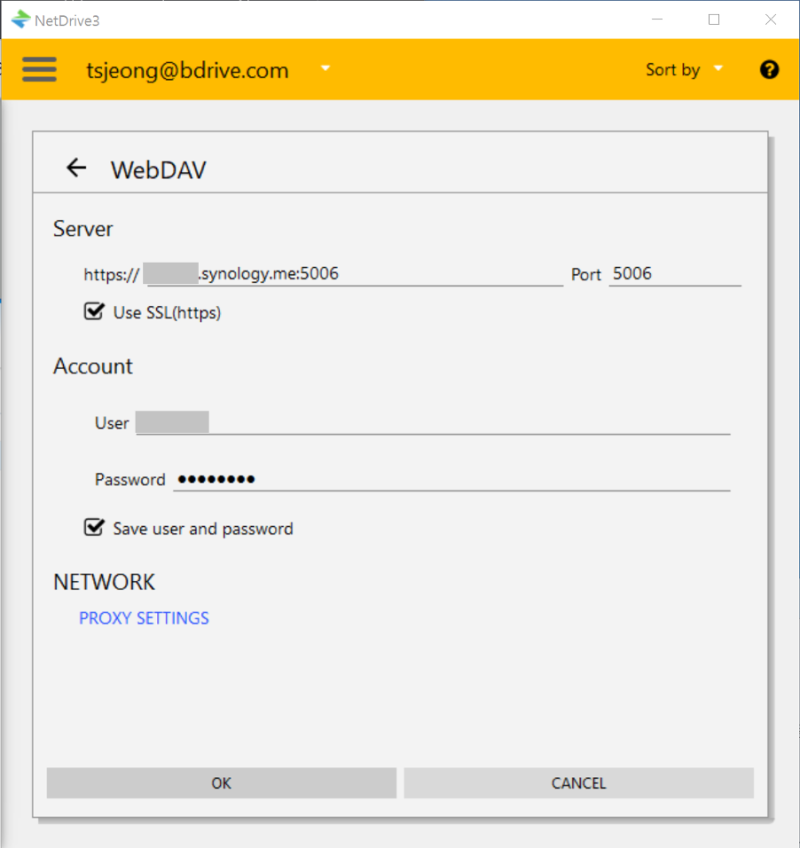
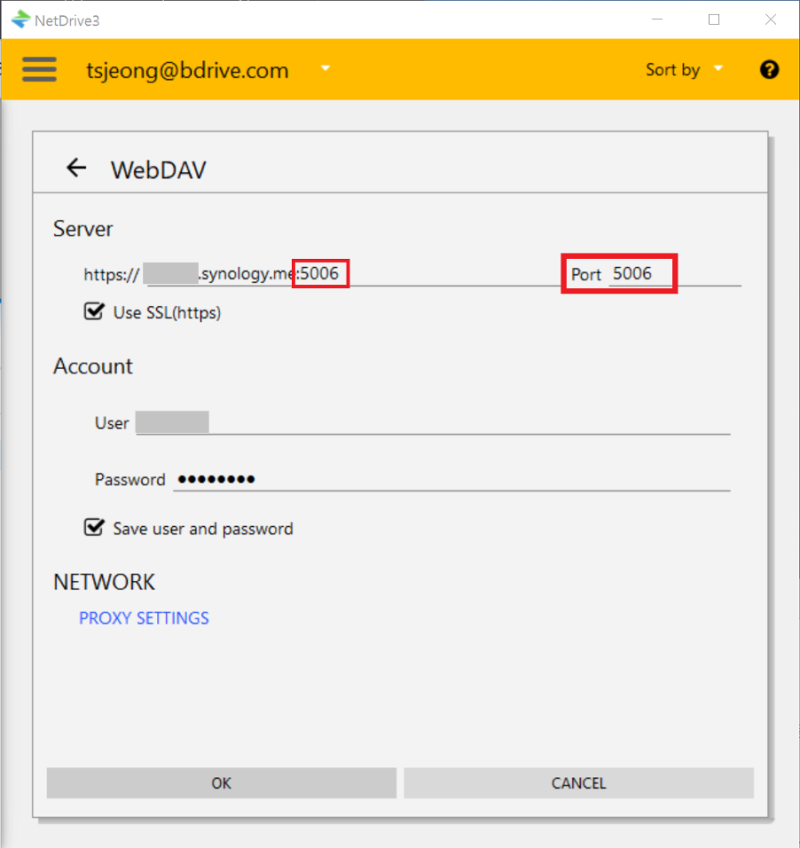
Type in the URL and port number of your Synology WebDAV in Server field. Check “Use SSL(https)” if you use HTTPS. (By default, Synology NAS WebDAV uses port 5005 for HTTP and 5006 for HTTPS) Type in User ID and Password in Account field. (This Account requires the access permission to WebDAV)
Default setup on Drive Item can be performed in Configure a Personal Drive page. Refer to the manual for detail information.

Click “CONNECT” button from WebDAV Drive Item and this will successfully mount WebDAV to the PC.
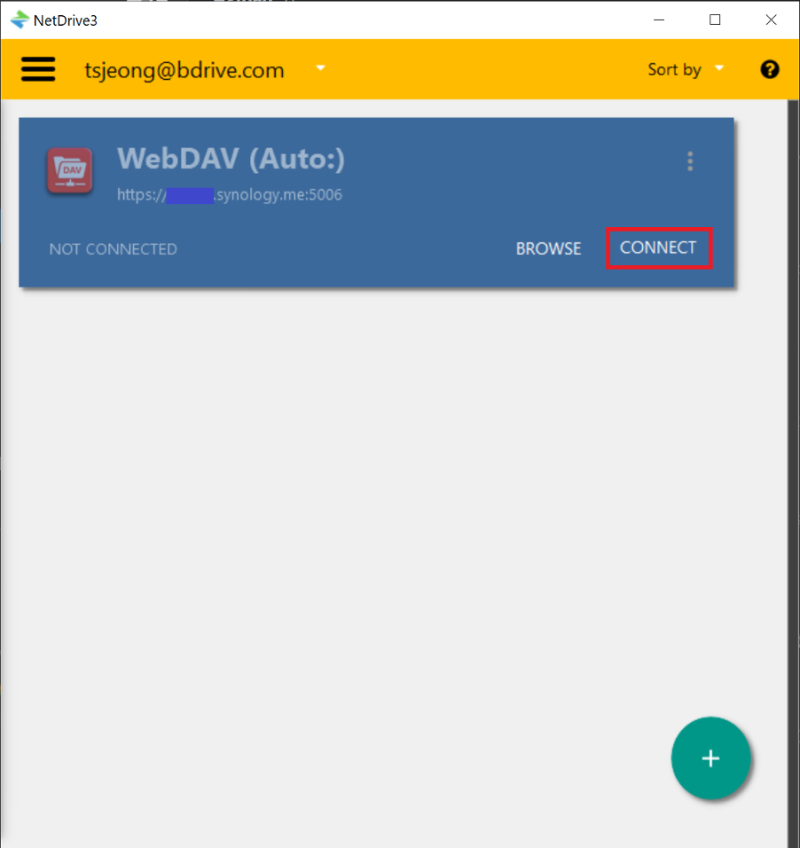
Using file explorer, check whether Synology NAS WebDAV is correctly mount or not.

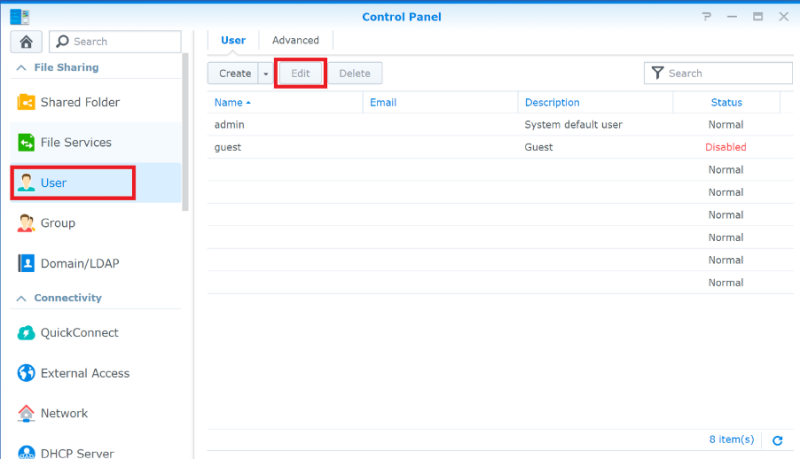
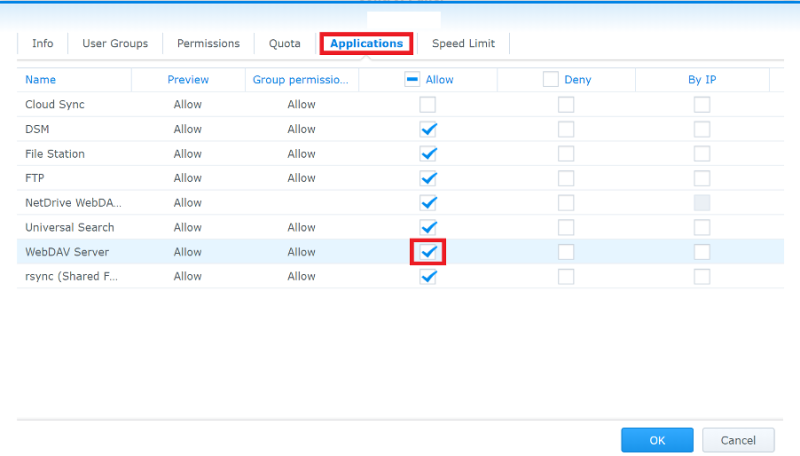
“WebDAV server” permission can be set in “User” menu in Control Panel of Synology NAS DSM.
Go to “User” menu in Control Panel and select the user to connect to WebDAV, and then click “Edit”.
Go to “Applications” tab and select “Allow” in WebDAV Server field.
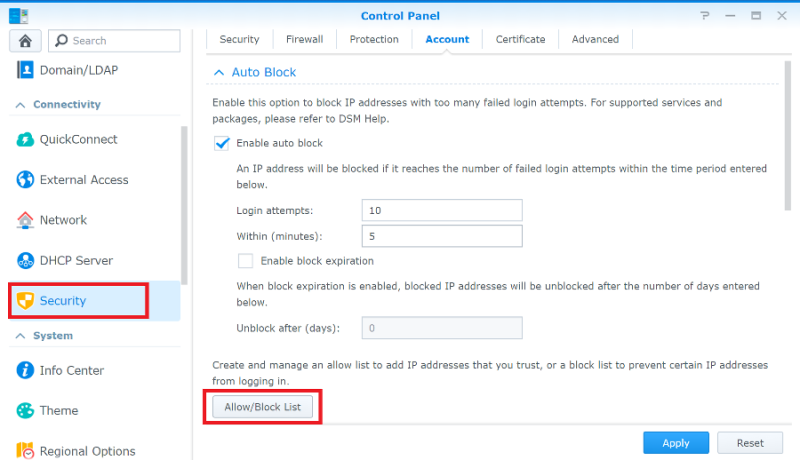
Check whether user ID is registered in auto block list in Synology NAS DSM. If user IP is included in the block list, remove the IP from the list.
Check whether the port number of Synology NAS WebDAV is correctly set in NetDrive Drive Item WebDAV.

Occasionally Synology NAS WebDAV application does not operate normally. In this case, connection failure occurs when trying to access to WebDAV from the internet. It is recommended to restart Synology NAS and then retry the connection.
Router setup information seldomly changes after software update of the router. If port forwarding option is used, it is necessary to check the port number.